
- Variable parameter control
- Expressions parameter control
- Target selection
- Parameter adjustment tool
- Snap to Point
The inspector is the section where all parameters are displayed and can be changed and altered. Parameters are separated into different groups and each group is sectioned off into its own tab. By holding shift + primary click, multiple tabs / groups of parameters can be selected and be displayed in the inspector window.
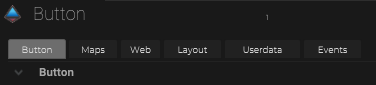
To open up any parameters the object, IO connection, node or setting first needs to be clicked on this will open up the parameters within the inspector.
When the object’s settings are open the individual parameters can be altered using the arrows next to each value. Just clicking the arrows will change the number by a value of 1, pressing alt + click will change the number by integers of 10. The value can also be changed by clicking inside the box and typing the exact number in the box.
Each of the numbered parameters can be altered in three ways:
- Using the arrows to the right of the value. Mouse click will change the number by an integer of 1. Holding down shift + mouse click will change the number by an integer of 10.
- The value can be manually altered by typing in the correct value
- The value can be altered by sum (add +, subtract -, multiply * and divide /).

On/Off boxes can be toggled on and off by clicking in the box.

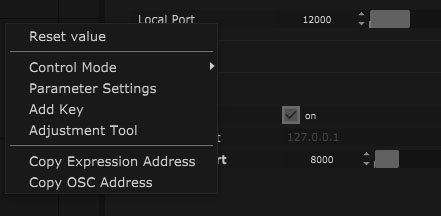
Right-clicking over the parameters opens up an options menu.
- Reset Value
- Control Mode – Manual & Expression.
- Parameter Settings
- Add Key
- Adjustment Tool
- Copy Expression Address
- Copy OSC Address
Renaming through multiselection
Names and values can be altered through multi-selecting and using $num and $value. This generates numbers or indexes as the values increase as will the number/index.
For example: In a LiveLink map output you can type in “Fixture $num” this will cause the output names to increase as the numbers of fixtures increase (Fixture 1, Fixture 2 ect.)
Object Tree
Object Trees can be renamed together by right-clicking and using the formulas: $index, $num, $folder, $type, $id and $oid.
Values
All float values (size, position ect) can be written as: km m dm cm mm in ft.
However, they will be converted into meters.
For example: 10mm -> 0.010m
Values can also be written as a calculation, using multiple units of length.
For example: 10km + 1m + 200mm = 10001.2m
Time values: ms m min hr s (millisecond, meter, minute, hour, second).
Extention Windows
The options available vary depending on the type of object, IO connection or node.

Floating Inspector

This opens up a floating inspector window, this window can be locked open. This means other variables can be changed while keeping useful parameters for certain objects open.

Manual Link

Clicking this will open up the relevant manual page online.
Connection View

This view contains information on the object such as its ID No., Base ID and Type. The colour values of the object can be altered and movements such as, ‘move to’ and ‘morph to’ can be added to the object.

Camera View

This is specific to the camera, and it will activate the camera view in the viewport.
Target Parameters
Target parameters can be selected using a drag and drop method.
Any object which affects or triggers an event of another object can be selected by using the target button and going through the various options or by using this method.
1. Open the object which is going to be affected, select and hold down the left mouse button.
2. Drag this parameter over to the object or node which contains the target button.
3. Once this object/node has opened. Drop this parameter onto the target button and this will attach the object/parameter to this target.