
This is an area within the virtual 3D space and has the ability to detect virtual objects entering and leaving the space. This can be used to output a variety of messages and triggers internally and externally from Stage Precision.
Coordinates
| Name | Description |
|---|---|
| Position | This will move the object along X, Y and Z axis in the local space. |
| Scale | Scale of the coordinate system. To scale the Object check the settings under “Display” |
| Rotation | Rotation of the object along X, Y and Z axis. |

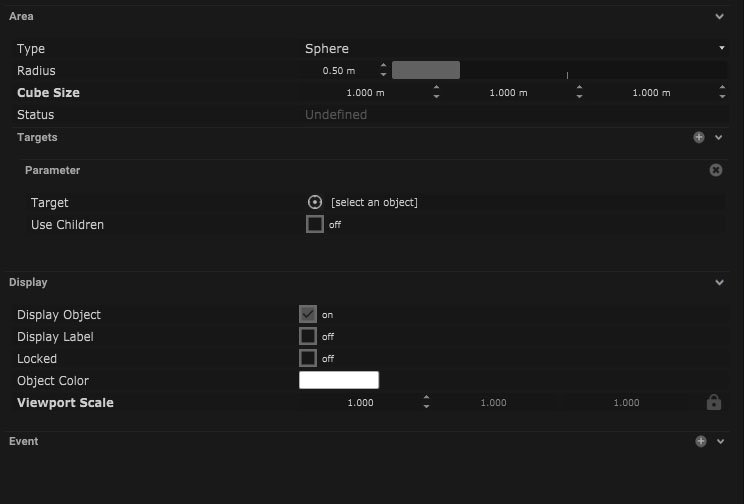
Area Setup
| Name | Description |
|---|---|
| Type | Choice of the shape that the area can resemble, sphere or cube. |
| Radius | Dimensions of the trigger area from the center to the edge when a sphere. |
| Cube Size | Dimensions of the trigger area when a cube along the X, Y and Z axis. |
Targets
| Name | Description |
|---|---|
| Target | A target object can be selected by using the trigger button. The target object/s will cause the event to happen when they enter the area. |
| Use Children | Ticking this button will cause the area to use the target objects children to be seen as target objects. |
Events
Triggers that cause events can be added by using the + button.
Event Triggers
| Name | Description |
|---|---|
| Events |
|
Advanced
| Name | Description |
|---|---|
| Min Enter Time | The minimum time before the event happens after the target parameter enters the area can be set here. |
| Min Exit Time | The minimum time before the event happens after the target parameter exits can be set here. |
| Cooldown |
Display
| Name | Description |
|---|---|
| Display Object | If ticked, the object will be visible in the scene. If un-ticked, the object will not be visible. |
| Display Label | When on, there will be a label displayed next to the object. |
| Locked | When un-ticked, it activates keyboard shortcuts – pressing ‘E’ allows you to move and ‘R’ rotate. |
| Object Colour | Double click the colour block and this will open a colour picker. This can be used to change the object display colour. |
| Viewport Scale | Dimensions of the object in the viewport in meters. |
Display Settings Tutorial
Video Tutorial
Area setup.
Mapping
Node Based
The object can be controlled and used as a node. The node is created by clicking and dragging the parameter on to the board.

| Name | Description |
|---|---|
| Type |
|
| Target Object | This is the object that will either be affected by the incoming values or output information. |
| Position | The directional XYZ values will be displayed here. |
| Rotation | The rotational XYZ values will be displayed here. |
| Enabled | When on, the parameter is active and enabled. |
| Display Colour | This colour block can be changed by changing the parameter. |

Layout
| Enabled | When on, the parameter is active and enabled. |
| Locked | When on, the node is locked into its position on the board. |