
Within SP, there is the possibility to control a PTZ camera. Of course the basic control is carried out using the PTZ Camera object with a supported Map Output. However, there are advanced functions that SP can do to further automate the PTZ Camera.
Initial Setup
In order to control a PTZ camera from SP, it is necessary to do the following steps
- Add PTZ Camera under the Object tree
- Add Visca Panasonic IOConnection and enter the appropriate values to configure the IO Connection
- Under the PTZ Camera object that was just created, add a Map Output for the corresponding IO connection
- Under the Settings tab of the PTZ Camera object, it is a good idea to define the pan, tilt range along with the other settings. For some PTZ models, you might find a template already available by pressing the “C” icon.
Under the PTZ Camera object, in the inspector under the PTZ Camera tab, there is a parameter called “Controller”. Changing this would change the mode in which SP would be controlling the PTZ Camera.
Controller: Pan/Tilt
This mode is used if the PTZ camera wants to be controlled by SP manually. This means SP can send over the Pan / Tilt values over and ask the camera to pan/tilt.
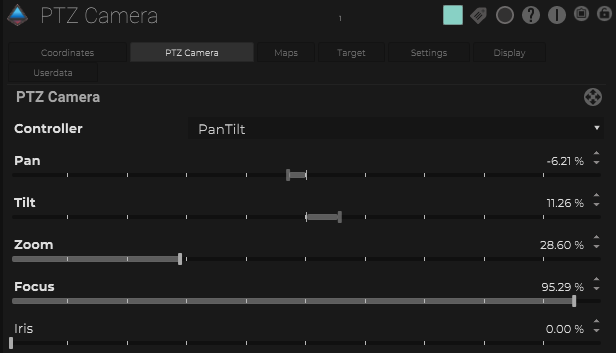
If the initial setup has been done correctly and the controller mode has been changed to “Pan/Tilt”, then now changing the pan / tilt values in the inspector should move the connected PTZ camera.
There is an Board Interface object called XYStick that can be useful when trying to control the PTZ camera in this way. Have the XY Stick interface be in the “Absolute” mode and connect the x/y values to the pan/tilt values
Controller: Target
This mode is used if the PTZ camera needs to be following specific target(s).
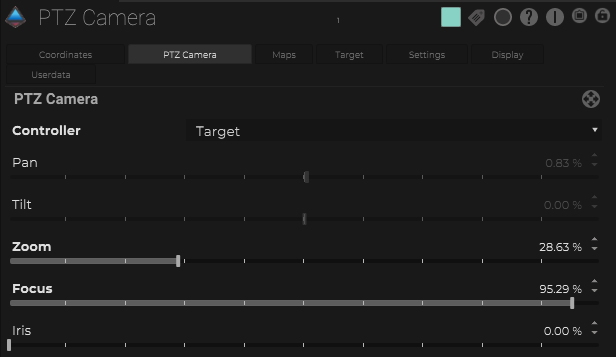
If the initial setup has been done correctly and the controller mode has been changed to “Target”, then should see the pan / tilt sliders are greyed out and no longer active. This is an indication that the pan / tilt values are now controlled and driven by something else.
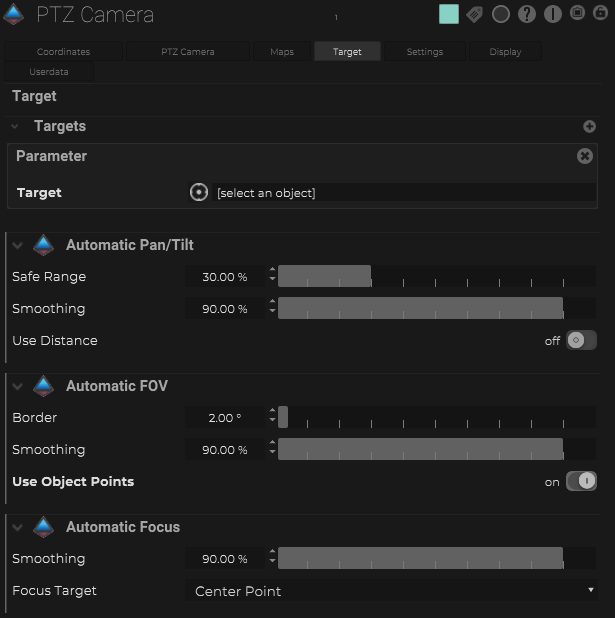
To define what is the target that the PTZ camera should be following, go under the “Target” tab in the inspector, and start adding targets by pressing the (+) button under the Targets container.
Define the Target
One possible object that can be used as a target for the PTZ camera to follow is the Target Frame object.
With this object, it is possible to define a 2D frame via the Frame Width, and Frame Height. This helps to automate and define what the FoV should be for the PTZ camera
Once there is a Target Frame, go in the PTZ camera object and link the Target Frame object as a Target.

When this is done, if the Target Frame starts moving, the PTZ should be moving and keeping it within the frame of the camera.
Fine Tune Adjustments
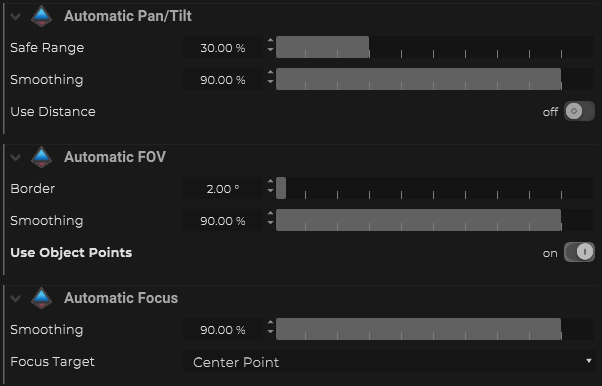
Below the Targets of the Target tab of the PTZ camera in the inspector, there are some options of what properties to automate and some settings related to each.
| Name | Description |
|---|---|
| Automatic Pan/Tilt | Controls the Pan/Tilt of the camera to follow the target(s) |
| Automatic FOV | Depending on the size and distance of the target, automate the FoV of the camera to keep targets in frame. In most situation, “Use Object Points” should be enabled |
| Auotmatic Focus | Depending on the distance of the target, automate the focus of the camera to keep target in focus based on the FoV curve defined in the settings |
Depending on the necessary situation, can adjust the safe range, border, and smoothing settings for each of the options to achieve the desired effect. For details of what each of the settings do, please refer to the PTZ Camera object.