
Interface

A breakdown of the toolbar at the top of the Image Calibration Wizard:
 |
Switch to expand the list of images captured for observation |
 |
The button to capture an image from the camera feed for observation |
 |
Run a calibration based on the currently captured observations. This would generate an Alignment Profile. |
 |
Open the Settings Menu |
 |
Open the list of calibration screens |
Setup
There are 2 minimum things that needs to be done.
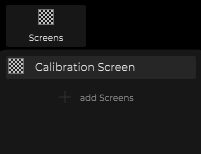
- The 1st thing is to go into the screens list and add the calibration screen as mentioned in the previous section.
![]()
- The 2nd thing to do is to go into the settings section and link the Image Provider with the Media Input of where the camera feed is coming in from. This should have been setup based on what was mentioned in the previous section.
In the Settings page of the Calibration Wizard, thare are additional optional settings:
| Name | Description |
|---|---|
| Image Provider | The source of the camera feed |
| Audio Feedback | enable an audio feedback when an image has been captured |
| Overlay | The option to overlay the centre cross on top of the Image Provider feed |
| Filter Angle | The angle at which the Caibration engine would filter out the markers even if they are visible to the system |
| Scale Optimisation | |
| Reposition Panels | |
| Min Marker per Screen | The minimum number of markers needed per calibration screen |
| Iteration Limit | the maximum number of iteration for the calibration engine to run |
| Show Grazing Angle | Show the grazing angle as an overlay in the capture screen |
Once the wizard is all setup with an image provider, and knows which screen is used for the calibration process, you are now ready to start capturing observations. Click here learn more.