
For the general configuration on how to work with a PTZ camera, please refer to here.
In this page, we will be mainly focusing on how to setup a Panasonic PTZ camera, specifically the UE 100, UE 150, and the UE160.
Configure PTZ camera to send out FreeD Data
In order to fully control the PTZ camera, SP will need to get data from the camera via the FreeD protocol. Therefore it is important to make sure that the Panasonic camera is configured to send out FreeD data.
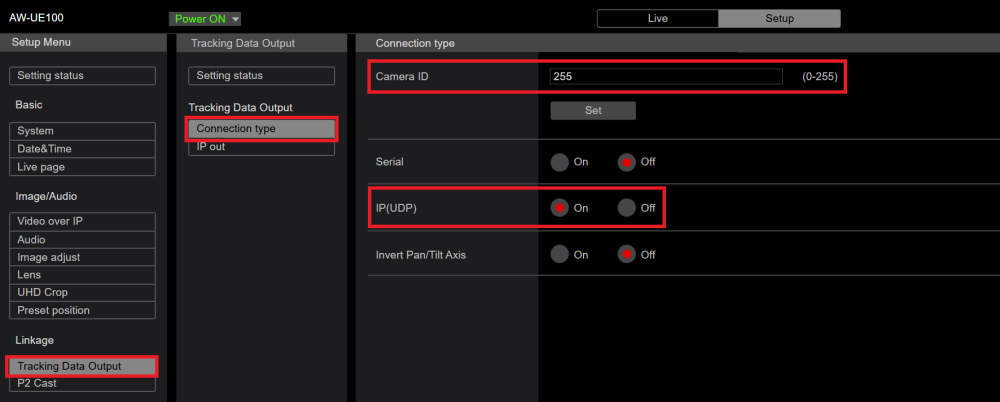
- Within the Web Configuration Tool, go into the Tracking Data Output.
- Under the Connection Type, please enable IP(UDP) and also assign a Camera ID of your choice
![]()
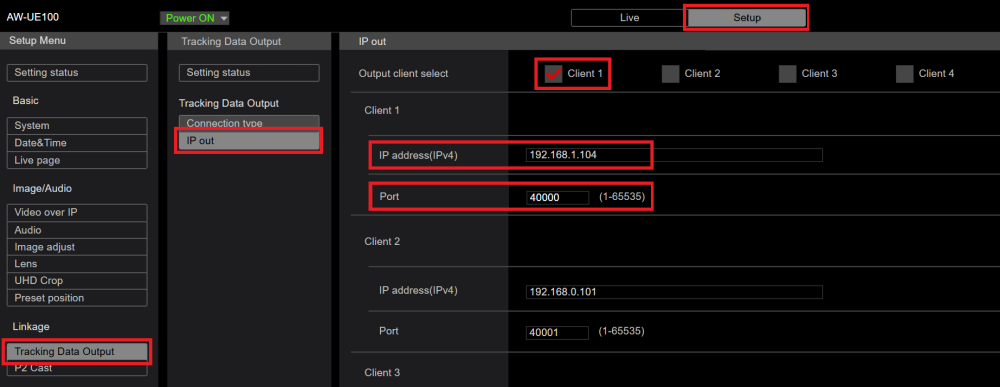
- Under the IP out section, please enable one of the client
- Under the corresponding client, please enter the IP address of the SP machine and define your desired port number
![]()
Configure PTZ Camera object inside SP
- Within the selected PTZ camera object, in the Connection tab inside the Inspector
- enter the IP address of the PTZ camera
- choose the correct Network interface on the SP machine that is connected to the same network as the PTZ camera
- ensure that the port number is the same as above
- enter the same Camera ID as above
![]()

If some of the configurations are not setup correct, the connection would not be valid and the object will be shown as red in the Object tree

If all the setup is correct, and SP is receiving feedback data from the PTZ camera, then the object will be shown as green in the Object tree

Installation Position of the Camera
In the situtation where the PTZ camera is mounted upside down where it is hanging from the top, there are some additional setup needed to make working with the object easier.
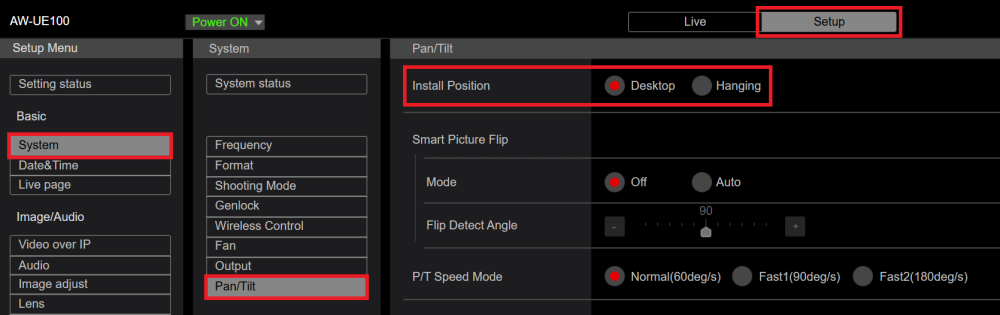
Within the Web Configuration Tool of the Panasonic PTZ camera, there is the option to configure how the camera is mounted.
Go into the System – Pan/Tilt section, Under the Install Position option, you have the choice to select Desktop of Hanging. If the camera is mounted upside down, please choose Hanging.
Within the SP software, you will also need to configure the install position accordingly as well. In the Inspector, under the Control tab, there is a Settings container, and you can choose how the camera is installed.

Joystick Control
Under different circumstance, you might want to adjust how the joystick controller behaves with the PTZ camera. For example, you might want to change the setting so that the joystick would react to inputs much faster for a more immediate response.
These settings can be found under the Web Configuration Tool, in the System – Pan/Tilt section, under the P/T Speed Mode, and P/T Acceleration Setting

If at any point these settings have been changed, it is important that SP recalibrations the Pan/Tilt speed curve accordingly.
To do so, In the Inspector, under the Calibration tab, choose the Calibration Type to be PAN
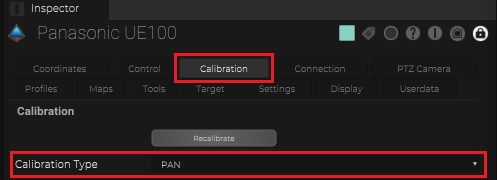
Then press the Recalibrate button to run through the calibration process

This process will take a few minutes as the camera pans around a few times.