
Interface

A breakdown of the toolbar at the top of the Calibration Wizard:
 |
Switch to view the list of observations that have been captured |
 |
Switch to the capture mode |
 |
Open the list of calibration screens |
 |
Readout of the currently receiving Zoom value |
 |
Readout of the currently receiving Focus value |
| |
Readout of the state of the tracking data. This will only be shown if the calibration mode requires tracking data. |
 |
Run a calibration based on the currently captured observations. This would generate a Lens Profile and in some cases also an Alignment Profile. |
 |
Open the Distortion Viewer |
 |
Open the Settings Menu |
Settings
In the Settings page of the Calibration Wizard, are additional optional settings:
| Name | Description |
|---|---|
| Image Provider | The source of the camera feed |
| Tolerance Observation | |
| Min Grazing Angle – None Tracking | The minimum angle between the camera and the calibration markers to be still considered as a valid marker. |
| Auto Recalculate by new Image | Enable the option to automatically running the calibration when a new image has been captured |
| Audio Feedback | enable an audio feedback when an image has been captured |
| Auto Capture | enable the auto capture option |
| Min Markers | the number of minimum markers that need to be detected before the auto capture function will capture an image |
| Min Distance | |
| Max Movement | The maximum amount of movement to be accepted and still continue with capturing of an image |
| Min Wait Time | Interval between each capture when auto capture function is enabled |
| Filter Angle | The angle at which the Caibration engine would filter out the markers even if they are visible to the system |
| Filter Size | The size of the markers in relation to the camera sensor which the Caibration engine would filter out the markers even if they are visible to the system |
| Scale Optimisation | |
| Reposition Panels | |
| Min Marker per Screen | The minimum number of markers needed per calibration screen |
| Iteration Limit | the maximum number of iteration for the calibration engine to run |
| Show Grazing Angle | Show the grazing angle as an overlay in the capture screen |
Capture Images
 |
Capture a frame |
 |
Start auto capture |
 |
Capture Next Step (only in Lens Calibration, needed between different observations) |
Observations

At the top you have the Zoom / Focus graph, similar to the one you see in the Lens Profile. On the left axis is the Focus, and on the bottom axis is the Zoom.
A green dot represents a calibrated zoom/focus step.
A grey dot represents a non-calibrated zoom/focus step.
A small white dot represents where the currently incoming zoom / focus value is.
Below the graph, you have the list of all the observations for each of the zoom / focus step. In this list, you can see the total number of images captured for that specific step, the actual zoom and focus value for that step, whether that specific zoom/focus step has been calculated or not, and the calculated error margin for that specific zoom/focus step.
Analyse
On the left side of the window, you can access the different tabs.
Analyse Observation

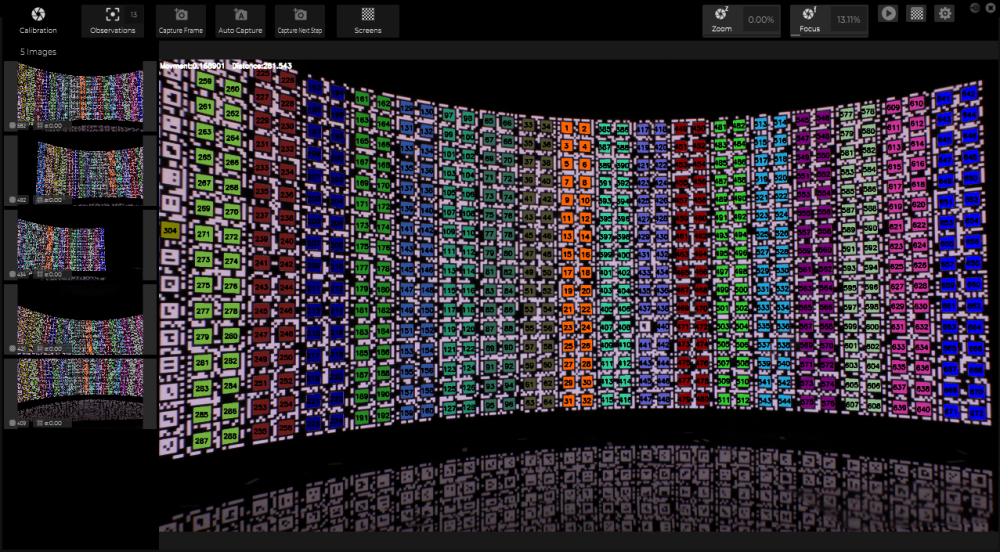
This is a grid view of all the images captured at the specific zoom / focus step. At the bottom left corner of each image, there is an error number associated with it.
If one image has a high error, right clicking on an image opens the secondary menu to access some extra options.
| Name | Description |
|---|---|
| disable image | toggle this image to be included into the calibration |
| Reanalyse Image | If the image needs to be re-linked or reanalyze |
| Reanalyze All Image | Reanalyze all of the images for this zoom / focus step |
| Run Camera Calibration | The same as pressing play button to run the calibration on all the active images |
| Copy Image Path | Copy the path of the image to the clipboard |
| Show in Explorer | Open the File Explorer at the folder path of the image |
Analyse Distribution

Analyse Distortion

This shows the calculated distortion of the lens at this specific zoom / focus step.
Analyse Result

This shows the result of the calibration for this zoom / focus step.