This is the Camera SDK software which provides 2D camera object data.
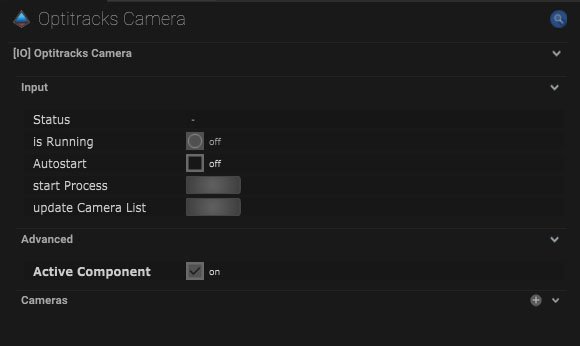
Optitrack Camera Setup
| Name |
Description |
| Status |
The status of the incoming data will be displayed here. |
| Is Running |
When on, data is being recieved. |
| Autostart |
When on, the Optitrack camera data will autostart. |
| Start-Process |
This button starts the Optitrack process. |
| Update Camera List |
This button updates the camera list. |
Advanced
| Name |
Description |
| Active Component |
When on, the Optitrack camera will be active. |
![]()
Cameras
Cameras can be added by pressing the + button next to the camera title.
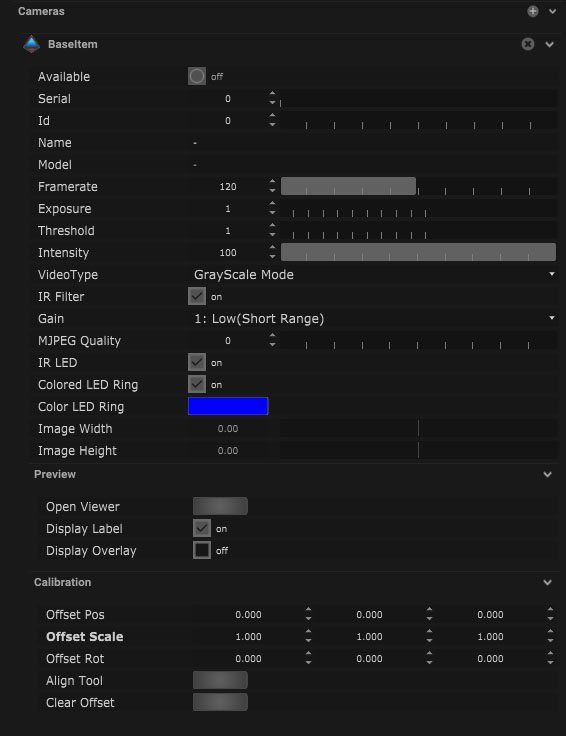
Base Item
| Name |
Description |
| Available |
When on, the camera is available. |
| Serial |
The serial of the camera can be added here. |
| Id |
The Id number of the camera can be added here. |
| Name |
The name of the camera can be written here. |
| Model |
The camera model will be displayed here when the camera is connected. |
| Framerate |
The frame rate of the camera added here. |
| Exposure |
The exposure of the camera can be adjusted. |
| Threshold |
The threshold of the camera can be adjusted. |
| Intensity |
The intensity of the camera can be adjusted. |
| Video Type |
- GrayScale Mode
- Object Mode
- MJPEG Mode
- Precision Mode
|
| IR Filter |
When on, the infrared light will be filtered out. |
| Gain |
This ranges from 1: Low(Short Range) to 8: Low(Long Range) |
| MJPEG Quality |
The quality can be changed here. |
| IR LED |
When on, the LED will emit infrared. |
| Coloured LED Ring |
When on, the LED ring will be coloured. |
| Colour LED Ring |
Colour of LED ring can be altered. Clicking the colour box opens a colour picker with RGB (red, green, blue) and alpha control. |
| Image Width |
The image width is determined by the camera type. |
| Image Height |
The image height is determined by the camera type. |
Calibration
| Name |
Description |
| Offset Position |
Any positional offset to the data can be set. |
| Offset Scale |
Any scale offset to the data can be set. |
| Offset Rotation |
Any rotational offset to the data can be set. |
| Align Tool |
Pressing this button will align the tracking data with the object. |
| Clear Offset |
Pressing this button will reset all the offset coordinates. |
![]()
Optitack Camera Mapping
Maps In
| Name |
Description |
| Use Active Marker |
When on, the data from the active marker will be used. |
| Use Passive Marker |
When on, the data from passive markers will be used. |
| Filter Camera |
When on, cameras will be filtered. |
| Camera Serial |
the ID number or serial number of the camera can be added here. |
| Position Type |
- Relative – The position of the data is relative to the object.
- Absolute – The position of the data is absolute to the world.
|
Status
| Name |
Description |
| Tracked State |
- Undefined – When tracker does not have a map input.
- Inactive – When the tracker has a follow object input map.
- Active – When the tracker has a target object map input.
|
| Enable Recording |
When on, the tracking data can be recorded. |
Mapping Polygon
| Name |
Description |
| Point |
This is the XY position of the initial point. |
| Point 1 |
This is the XY position of the first point. |
| Point 2 |
This is the XY position of the second point. |
| Point 3 |
This is the XY position of the third point. |
| Alpha |
This is the alpha level from 0 to 1. |
| Border Colour |
The colour of the border can be altered. Clicking the colour box opens a colour picker with RGB (red, green, blue) and alpha control. |
| Show Image |
When on, the image will be shown. |
| Show Blobs |
When on, the blobs will be shown. |
| Show Excludes |
|
![]()
Compatible Input Objects