
All of the manufacturer specific PTZ camera objects would be organized under this category.
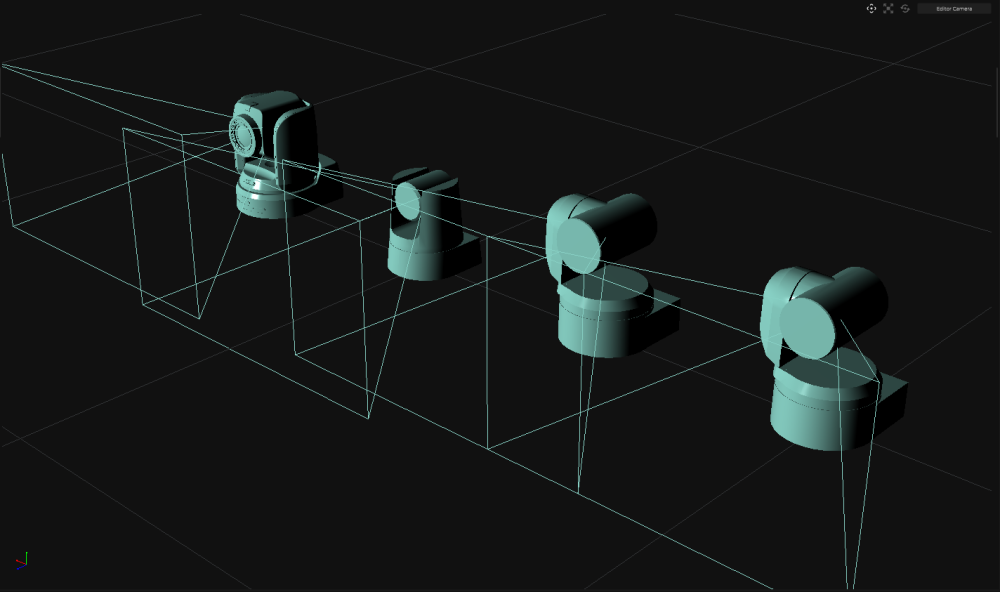
Currently, we have the following manufacturer specific PTZ cameras:
- Panasonic UE 100
- Panasonic UE 150
- Panasonic UE 160
- Sony BRC-X1000
- Sony FR7
All of these objects behave similar to the standard PTZ camera object with a few additional optimization.
Setup
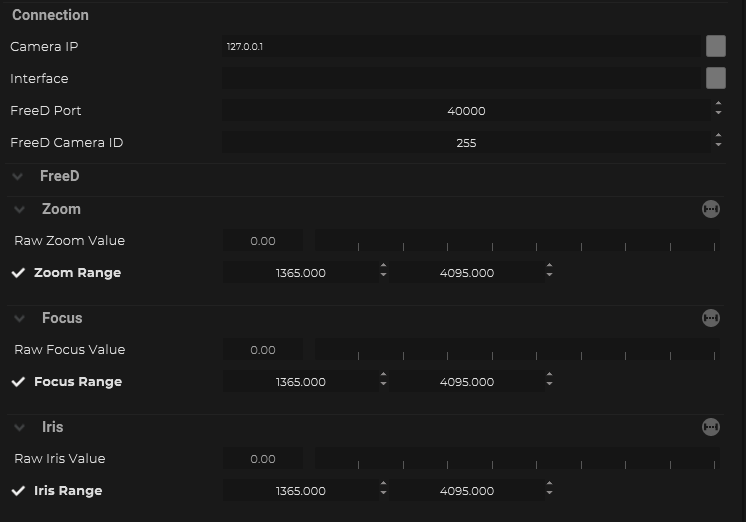
To start off, each of these PTZ camera objects now have a tab called “Connection” where you would be defining how to connect with that camera
| Name | Description |
|---|---|
| Camera IP | This is where the target IP address of the host can be input. |
| Interface | This is the IP address of the local network interface (NIC) which should be used for this connection. |
| FreeD Port | Port that would be used to communicate with FreeD |
| FreeD Camera ID | This is the ID number configured on the camera side. |
Within the “FreeD” container, you also have to option to range the encoders for Zoom, Focus, and Iris.
Prior to moving forward, it is important to ensure that the install position of the PTZ camera is configured properly in SP to match how it is being mounted. Having this setup correctly will ensure that the joystick emulation is working in the correct direction.

Under the Install Position property, there are 2 options: Desktop and Hanging. If the PTZ camera is placed on the desk, then Desktop mode is fine. If the PTZ camera is hanging from the top, then it is important to change this to Hanging.
h2 Presets
There are some built in options to load and delete presets that are stored inside the PTZ camera.

Control
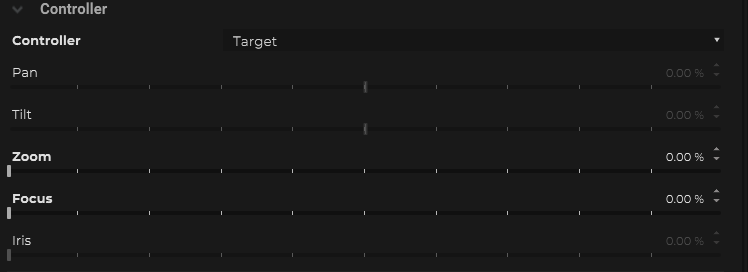
Within these specific PTZ cameras, there are more control modes under the Controller option.
Manual
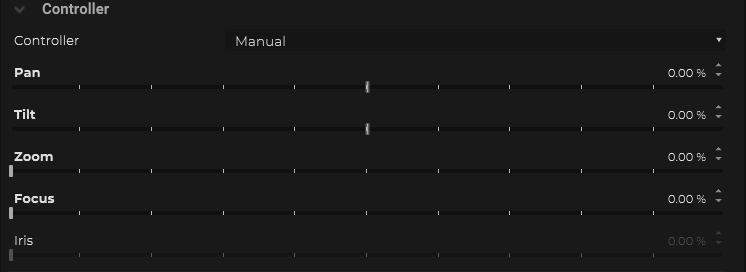
This mode allows users to manually control the absolute value for Pan and Tilt, and Zoom, Focus and Iris.
When the Controller mode is in “Manual”, there is the option to calibrate the speed curve for the Pan, Focus, Zoom.
In some of the cameras, there is the setting to change the speed of these controllers. If this has been changed, it is important for SP to recalibrate the speed curve for them. For more details please refer to further down the page.
None
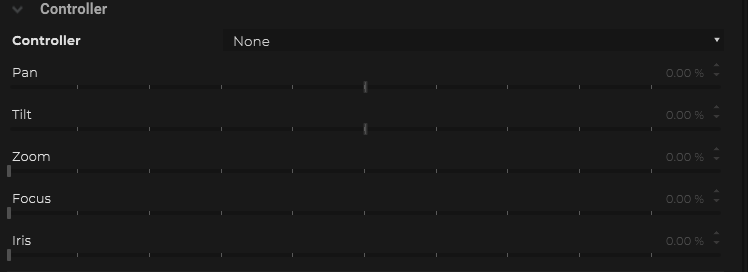
This mode will disable all pan, tilt, zoom, focus, and iris control.
User can only use the other functions like Power On, Power Off, etc.
Target
This mode allows SP to control the PTZ camera to target another object in the SP project. Typically this would be used in conjunction with the Target Frame object. It is possible to add more than one target object by clicking on the (+) button within the “Target” container.
If this mode is selected, it is important to go under the “Target” tab of the PTZ camera object and select which object to target and decided whether SP is only controlly Pan/Tilt, or also Zoom(FoV), and/or Focus.
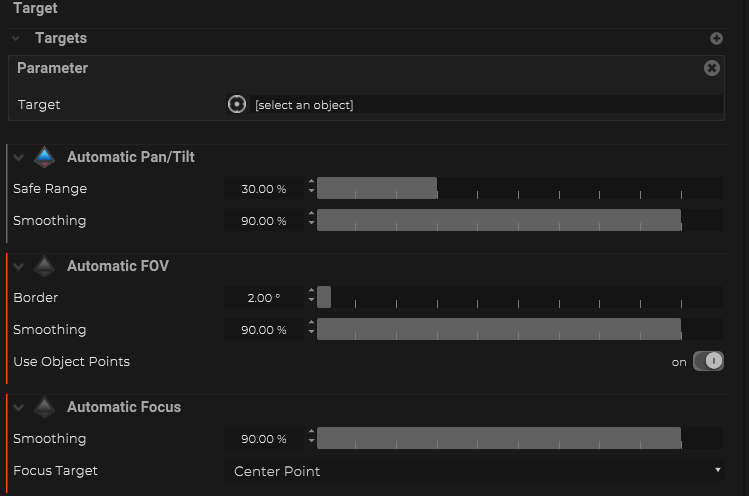
For the Automatic Pan/Tilt and Automatic FoV, there is the option to create a buffer zone.
For the Automatic Pan/Tilt, it is called the “Safe Range” which means that as long as the target is within the safe range, there will be no changes to the Pan/Tilt values.
Similarly for the Auotmatic FoV, it is called “Border”. So as long as the target object is still within a specific border around the frame, then there will be no changes to the Zoom value.
When the PTZ camera is in the Target mode, it is possible to increase the responsiveness of the Pan/Tilt, Zoom and/or Focus values by increase the gain for the corresponding value.

This gain is only internal to SP; so this is separate to any speed gain options might be possible within the PTZ camera itself.
Joystick
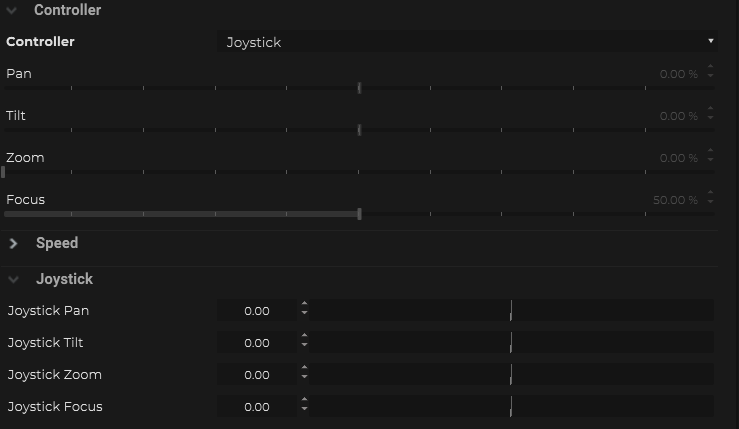
This mode allows SP to act as a joystick and control the PTZ camera. This might be more intuitive to some users when controlling the camera rather than using absolute values like in the manual mode.
Some users like like to switch to this joystick mode to position the camera from SP and then store the absolute values into a Selection Preset inside SP, which can then be recalled at a later point within SP. Remember to switch back to manual mode if you like to recall these selection presets. This also offers much more flexibility to control how quickly these presets are loaded from SP to the PTZ camera.
Calibration
During the operation of the PTZ camera from SP seems out of control, the first thing you would like to check is all of the speed parameters is not higher than 100%.
If you are using the target mode, check your gain values is not at high value; resetting it back to 1 might be a good idea. Also double check if your smoothing value is higher than 0 for the enabled parameter.
If PTZ camera is still behaving quite sporadic, there is a chance that the speed curve on the PTZ camera does not match with what SP has. If that is the case, then you would need to go to the “Calibration” tab and recalibrate the speed curve inside SP.
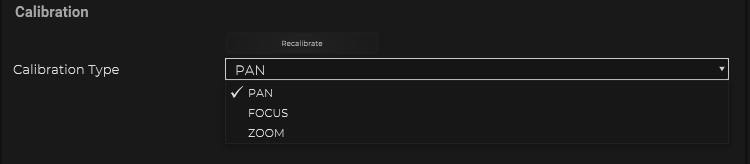
Prior to starting the recalibration process, it is critical to make sure values are all reset back to 0% in the “Manual” mode. Once this is done, user can go to the “Calibration” tab, choose the “Calibration Type” and click on the “Recalibrate” button. This will take a few seconds so please be patient.
Some users might want to manually go into the PTZ camera to increase the speed of specific parameter to hopefully increase the responsiveness of the controls. If this has been done, then again, a calibration would need to take place.