
Using the Volume object to manage the Point Data
From the previous step either from the “Image Based Blob Tracking “:http://manual.stageprecision.com/stage.precision.beta/en/topic/image-based-blob-trackingor” Point Cloud Blob Tracking”:http://manual.stageprecision.com/stage.precision.beta/en/topic/point-cloud-blob-tracking, the sensor is now sending out the point cloud data as a Point Data within SP.
The next step is to pass this Point Data into a Volume object and use it to mange the set of point data.
Create a Volume object and within the object, add a Map Input for “Point Data”.

Under the Point Data Provider field, select the object that is providing the point cloud data (ie the sensor that you are connected to).
As soon as the map input has been linked to a Point Data Provider, you should start to some dots appearing with a number next to it.
In the case of a 2D lidar, it would look something like this:

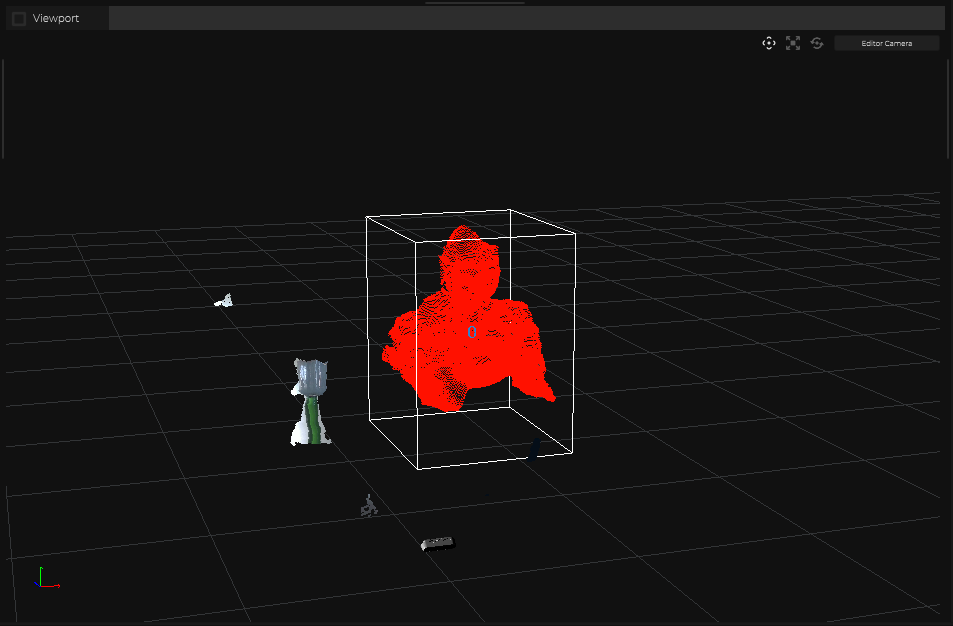
In the case of a 3D lidar, it would look something like this:
Fine Tuning the Data from the Volume Object
Within the Volume object, under the Maps – Volume Filter, there is the option to add a Tracking Filter. This filter can be used to control the following:
- Distance Tolerance – the distance between to tracked ID
- LifeTime Tolerance – If blobs are jumping in and out, it is possible to define a life time for that blob. So even if the blob disappears for a short period of time and come back again at the same location, the ID of that blob would remain the same.
What can be done with a Volume Object with Tracking Data
In this section we will be describing some of the possibilities now that the Volume object is able to detect desired objects moving around within the space.
Send Out the Tracking Data to Other Systems
Within the Volume Object, under the Maps – Volume Maps Output, you can add an output map and SP can take all the tracked object and send out the coordinate of that object along with its tracked ID. It is necessary that the supported type of IO connection to be created first. Some of the supported IO connections for such function are:
Creating Trigger Events
It is possible to define a specific area in 3D space such that when these tracked markers within the volume object enter or leaves this specified area, a trigger event would happen.To do this:
- Create an Area object, and define the size and location of this object
- Under the Area object, Area – Targets, create a Target
- Under the Target, link it with the Volume object created above
- Under the Area Object, Events section, you can create the trigger event that is needed like OnEnter, OnLeave as an example.
- Under this event, create the necessary actions that need to happen when this event is triggered.
For more information, please refer to this page.
Highlighting a Tracked object with a Specific ID
It is possible to filter out from all the tracked objects within the Volume object and only selecting one of them by a specific ID. To do so:
- Create a Tracker object
- Under the Tracker object, Maps – Maps Input, add a “Volume Point”
- Under the Maps Input – Target Volume, link it with te Volume object created above
- Under the Point Identifier, select the ID that you are interested in highlighting
From here, it is possible to then have this specific tracker’s coordinates to be send out via supported protocol by the tracker object, or pass this as the Target for an Area object and create Trigger Events specifically for this tracked ID.