
A Live Link connection will be automatically added when the project opens.
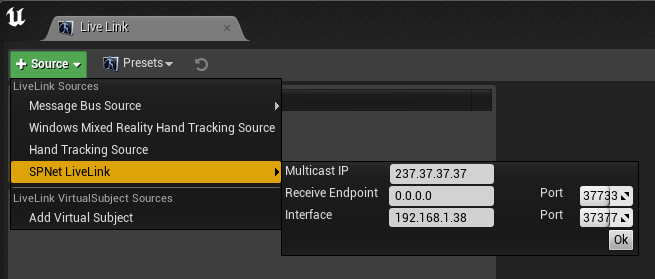
Add SPNet Live Link connection
If the connection is deleted manually it´s possible to add the connection again.
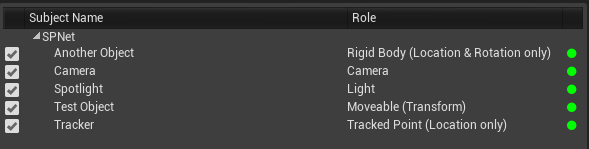
Supported Live Link types
- Cameras:
- Shield Camera Actor
- Cine Camera Actor
- Cine Camera Actor with Lens Distortion component
- Light:
- Point Light
- Spot Light
- Rect Light
- And for all other objects the types:
- Tracked Point (Location only)
- Rigid Body (Location & Rotation only)
- Moveable (Transform)

within SP, a map output with the correct type is necessary to send the data to Shield
Add a Live Link Subject to an object
To add a Live Link subject to an object, select these and click on “+ Add Component”
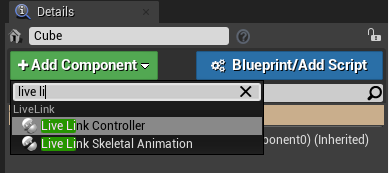
search for “live link” and add the “Live Link Controller”

select the live link component and select the desired subject
Drive the lens distortion from a Cine Camera
Select a “Cine Camera Actor” and add first the Live Link controller like above.
Define the desired subject, which needs to be a camera role.
Then add a Lens Distortion component -> “+ Add Component”.
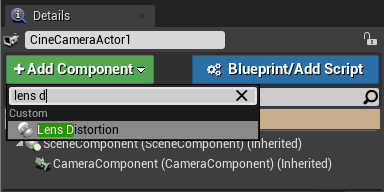
search for “Lens Distortion” and add the “Lens Distortion Component”

chose the “Distortion Source (should be equal to the desired subject)
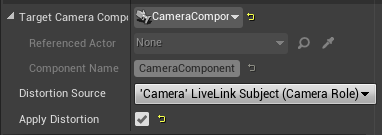
check the “Apply Distortion” option

the distortion should be already visible within the small preview
Define local interface
If your Unreal computer has multiple network interfaces it could happen that the LiveLink connection will not show the correct interface IP.
The LiveLink input gets the data from the network interface with the highest priority.
If you are using multiple interfaces you can define manually the interface priority.
- You need to go to “Control Panel -> Network and Internet -> Network Connections”
- Select your interface and click on properties
- Select your TCP/IPv4 protocol and open the properties
- Klick on “Advanced…”
- Uncheck the option “Automatic metric”
- Type in a number, for example “10”. (lower number = higher priority)
- Repeat these steps for all other interfaces but with higher numbers (20, 30, ..).
- Restart your computer